Thursday, March 17, 2016

Login to New Microsoft Dynamics AX RTW with different users -Part 2

In my last post, I have shown how to add new user in AAD and user in AX. In this post I will cover how to create users in AX RTW from different AAD.

Suppose you have users in different Azure Active Directory Domains.
In following screenshot, I have created a new testvinitg.onmicrosoft.com domain and a test vinitg user.


To give access to this user in AX RTW, create a new user in AX as follows:


Login using this user:


Wednesday, March 16, 2016

Login to New Microsoft Dynamics AX RTW with different users

In this post, I will cover how to manage users in Azure Active directory and user in AX RTW.

For login to new Microsoft Dynamics AX RTW, you need to have user in Azure Active directory.
To create new user, follow the procedure below:

Step 1: Login to Azure portal using the admin account.

https://manage.windowsazure.com/


Step 2: Create a new user using "ADD USER" button on the bottom. For this example I have created a new user 'ALICIA'.

Now login to AX using admin account.


Create new user as shown in above screenshot. You can also edit the existing user (in demo VM).
Use the alias which you created in step 1 (with your organization tenant).

Step 3: Now you can login using the new user with the role assigned to it.


Monday, March 14, 2016

Share link in Microsoft Dynamics AX RTW

In new Microsoft Dynamics AX, Sharing the form with filtered data has been made very simple. In each form under options, a new menu item is added -> Get a link.

 As shown in the above screen shot, I have applied the filter on the sales order list page. The copied web address looks like below:

https://usnconeboxax1aos.cloud.onebox.dynamics.com/?cmp=usp2&prt=initial&mi=display:SalesTableListPage&q=AQAAAHNm4l3JT6ikAPoAN%2f%2fzuzANlILUc2biXclPqKQA%2bgA3%2f%2fO7MA2UgtRCexg7P7ehAxeoykef1VEpZIDY5z4aEz%2favmvUHFxndM2BF8G3y%2fw1SbDMj55pnMlICLm4t4rY%2fNl9tlxvHWdI8ivBZCcRS801eGsCL7skthUBOy23sau4WcJCklkF%2bjSyQA5xBVCSwNhML6%2ftK8WtqiCjbXGq0STgWo%2fECQSJrSW5CZFIRAicT7BVMp380251Cy14JIhjGqMCU8W4x76qKuZXJmU52tsYqYQAdIy7tEujiI05uo9NrbbaeKrtLEC34Y8L%2bGawIXNWWL8u0owKfk4jyyjF%2ftGs42fbC1m4sUjBdy0d%2fsr27MLLekRqEkIAD2hM9K9shFa8qtpTR6JRPXYeaJYeJI3f%2bOLcUzQNWbDu4PvHyo4DR7nXfi4X%2fO6S6cSHvLoUujNxP4BrY7C%2fMp8x1FHXOm0DNtm5tdCgUEub5S0ppuWSEYJQai7p3y43LW5eFMO9AK8jY6JyjrK1fXudrQtL42VxA%2bhjfx05omSZQnpqi4OrJP4UcrfsveFKQk7mFZAVhL5Chfhnfp33KOrgnmcD%2bAV1QwwXz2pXcNZL3k8I23gK%2bAibAdtIYJXYDwl0E8Hyc3kkGOfeezfAWXN%2bAco0aElnKp2uagm3S1KTeI5jlr86%2fEAf6hhcHFKed8VmicJ8begpCpIYO3z0hXtEXijc9ags9KjPiEtaWLczvlI9vOlCKCP%2bvv%2bx%2fMl7UuUd8ZWA4kiyI89%2bSc3QaWe1Lb2pxjRpAyLB5Ahb%2bYAw7f6uvQY1bIfIbvz%2bvG6H9lu1d7oLnT096GlKRBE3VgKqeG0DhpKRvIp4cRm9VbIwdo%2bHOCYFVGCWIxq%2fkQuUiHMTUhZwQ39z9gbFrF1c


The query filter is stored in URL after the parameter "q". This is a great way to keep your favorite in the browser itself.


You can navigate directly to your most frequently used forms with filters already applied in a single click which will increase the efficiency for sure.

Sunday, March 13, 2016

Send a PO confirmation to vendor via email in new Microsoft Dynamics AX RTW

In this post, I will show how to configure SMTP server in new Microsoft Dynamics AX RTM and send the PO confirmation mail to vendor.

To sent the confirmation, we need to do the following:

Setup SMTP parameters.

Navigate to System administrator -> Email -> Email parameters


Set the values of following fields:

Outgoing mail server: aspmx.l.google.com
SMTP port number: 25
UserName: <gmail user name>
Password: <Password for sign in> 


For test purpose I am using gmail SMTP server. If you have your own SMTP server, you can use that.

Setup Print management settings for PO:
Navigate to Procurement and sourcing -> Forms -> Form setup


Click on the print management on general tab. In the print management form navigate to purchase order-> original default.


Click on the arrow as shown in the below screen shot:


 Set the email, CC subject and the file format in which you want to send the report. click ok.

Now you are ready to the PO to vendor:
Navigate to all purchase order.
Create new purchase order with required field and click on the confirmation.


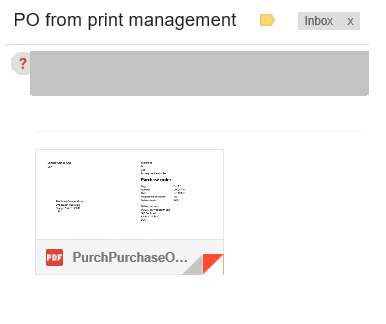
Make sure you select the print purchase order and use print management destination. Click ok. Confirmation will be posted and email will be sent to your provided email id. 

Debuggin in new Microsoft Dynamics AX RTW

Debugging in AX RTW is similar to the debugging of CIL in AX 2012. In AX 2012, we used to attach the Visual Studio debugger to Ax32Serv.exe. In AX RTW, We attach the debugger to w3wp.exe service. This is IIS worker process.


Make sure you have unchecked the load symbols only for the items in the solution. If this is checked Visual Studio will load only dlls corresponding to files in the solution for debugging.  


Please note that when you uncheck it, It will take time to load all the dlls corresponding to AX RTW.

Friday, March 4, 2016

Export Sales orders in 5 easy steps in new Microsoft Dynamics AX RTW

In my last post, I have mentioned how to use OOB composite entity for Import/Export using Data management. In this post I will show, how to create your own composite entity. I am taking the example of Sales Order which includes Sales Header and Sales Line.

Step 1: Go to visual studio and create your custom model for Application Suite model.

Step 2: Customize the table SalesOrderHeaderStaging.


Create 2 new fields in table: RowId and ParentRowId. To create these fields, you can drag drop fields from BankJournalHeaderStaging, Similarly Create index RowIdx


Step 3: Customize the table SalesOrderLineStaging.


Create 2 new fields in table: RowId and ParentRowId. To create these fields, you can drag drop fields from BankJournalHeaderStaging, Similarly Create index RowIdx. Create a relation to SalesOrderHeaderStaing Table as shown below in the screenshot.

Step 4: Create new composite entity. Give it a name SalesOrderDataEntity. Add new root data entity reference: SalesOrderHeaderEntity and then New Embedded Data Entity Reference: SalesOrderLineEntity


Make sure Relation is set to SalesOrderHeader.


Step 5: Build the solution. Create the Export data entity as shown in below snapshot. 

Click on the Export and that's it. You can now download the file which looks like below:


Tuesday, March 1, 2016

Import/Export data using composite entity in new Microsoft Dynamics AX RTW

In this post I will cover import-export data using the composite entities in new Microsoft Dynamics AX RTW. There are 12 composite entities available out of box.

I will take example of Customer Payment Journal entity.  It has 2 following entities as a part of it.
  • CustomerInvoiceJournalHeader
  • CustomerInvoiceJournalLine


Export the Payment journal:

Navigate to Data management.
Click on Export.
Fill in the details as follows:
    Name of the data package.
    Target Data format: For composite entity only allowed  data formats are XML-Element and XML-Attribute.
    Entity Name: Customer invoice journal

Click on the Add entity.
Customer payment journal entity will be added as shown below.


Click on the export.


As you see in the above screenshot, total 38 records were exported. 8 out of Header entity and 30 out of line. Click on the Download button. The XML file will be downloaded. It looks like below:


Import the Payment journal:

Similar to export create an import data package with same entity.


Upload the XML file with the new payment journal. I created a file with 1 header and 1 line and then click on import.


Directly from Staging data you can go to created payment journal.


Journal looks like below:


You can now validate and post the journal.